

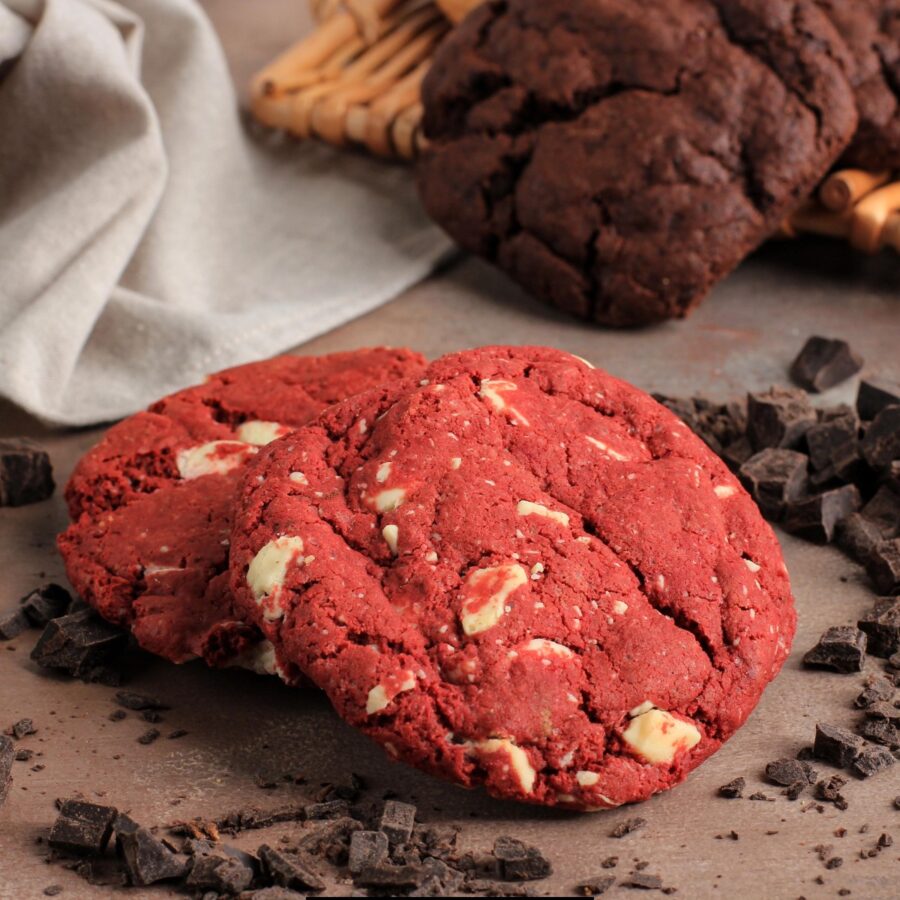
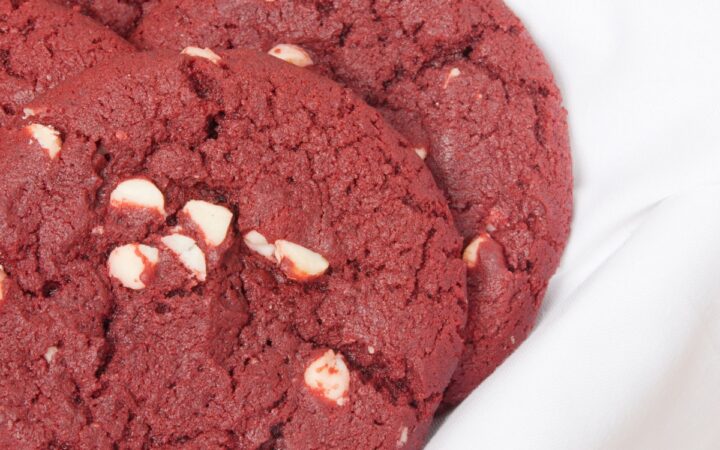
If you love the rich, chocolatey flavor of red velvet cake, these Red Velvet Cookies will be your new favorite treat. With a soft and chewy texture, a hint of cocoa, and a vibrant red color, these cookies are perfect for holidays, Valentine’s Day, or anytime you’re craving something sweet.

Why You'll Love This Delicious Dessert
- Soft and Chewy. These cookies have a perfect balance of crisp edges and a tender center.
- Rich Chocolate Flavor. A touch of cocoa powder gives them a mild chocolate taste without overpowering the classic red velvet flavor.
- Easy to Make. Simple ingredients and a quick baking time make these cookies a go-to recipe.
- Great for Holidays. Their vibrant red color makes them ideal for festive occasions.
Once you try these homemade red velvet cookies, you’ll never go back to store-bought versions again.
What Do Red Velvet Cookies Taste Like?
Red velvet cookies have a unique, rich flavor that is a perfect blend of chocolate, vanilla, and a subtle tang. Unlike traditional chocolate cookies, red velvet cookies contain just enough cocoa powder to add depth without being overwhelmingly chocolatey.
The hint of tanginess from buttermilk or vinegar gives them a distinctive taste that sets them apart from regular chocolate or sugar cookies.
Ingredients You'll Need
- All-Purpose Flour- Provides the structure and stability for the cookies while keeping them soft and tender. It helps balance moisture so the cookies hold their shape without being too dense.
- Cocoa Powder- Gives the cookies their signature mild chocolate flavor. Unlike traditional chocolate cookies, red velvet has just enough cocoa to add depth without overpowering the vanilla and tangy notes.
- Baking Soda- Acts as a leavening agent, helping the cookies rise slightly while maintaining a chewy, soft texture.
- Salt- Enhances the overall flavor balance, bringing out the sweetness and complementing the chocolate and vanilla notes.
- Unsalted Butter- Adds richness, moisture, and a tender texture to the cookies. It also contributes to their slightly crisp edges while keeping the centers soft.
- Granulated Sugar & Brown Sugar- The combination of sugars ensures the cookies are both chewy and flavorful. Granulated sugar helps the cookies spread and creates a crispier edge. Brown sugar adds moisture, chewiness, and a hint of caramel-like depth.
- Egg- Binds the ingredients together and provides structure and stability. It also helps give the cookies their soft and slightly puffy texture.
- Vanilla Extract- Enhances the warm, sweet, and slightly floral aroma, complementing the cocoa and buttermilk.
- Red Food Coloring- The key to achieving the iconic deep red hue. The color also enhances the visual appeal, making red velvet cookies stand out.
- Buttermilk or Vinegar- Adds a slight tangy flavor, a signature trait of red velvet. The acidity also reacts with the cocoa powder, enhancing the red hue and keeping the cookies soft and tender.
- White Chocolate Chips (Optional)- Adds extra sweetness and a creamy contrast against the rich red dough, making the cookies visually stunning and delicious.
Each of these ingredients works together to create soft, chewy, and flavorful red velvet cookies, making them a standout treat.
How To Make Red Velvet Cookies
- Preheat the Oven. Preheat your oven to 350°F and line a baking sheet with parchment paper.
- Mix the Dry Ingredients. In a medium bowl, whisk together the flour, cocoa powder, baking soda, and salt. Set aside.
- Cream the Butter and Sugars. In a large mixing bowl, beat the butter, granulated sugar, and brown sugar until light and fluffy. This takes about 2–3 minutes.
- Add the Wet Ingredients. Mix in the egg, vanilla extract, buttermilk (or vinegar), and red food coloring. Stir until well combined.
- Combine Wet and Dry Ingredients. Gradually add the dry ingredients to the wet mixture, mixing until just combined. Do not overmix, or the cookies may become dense.
- Fold in White Chocolate Chips (Optional). Gently fold in the white chocolate chips if using.
- Scoop and Bake. Use a cookie scoop or spoon to drop tablespoon-sized dough balls onto the lined baking sheet, spacing them about 2 inches apart. Bake for 9–11 minutes, or until the edges are set but the centers look slightly soft.
- Cool and Enjoy. Allow the cookies to cool on the baking sheet for 5 minutes, then transfer them to a wire rack to cool completely.
Tips And Tricks
Making red velvet cookies at home is easy, but following these tips will ensure they turn out soft, chewy, and full of flavor every time. From mixing the dough to baking and storing, these expert tricks will help you get the best results:
- Use Gel Food Coloring. Gel food coloring gives a more vibrant red hue without adding extra liquid.
- Chill the Dough for Thicker Cookies. If you prefer thicker cookies, refrigerate the dough for 30 minutes before baking.
- Do Not Overmix. Overmixing the dough can lead to tough cookies instead of soft and chewy ones.
- Measure Flour Correctly. Spoon the flour into the measuring cup and level it off to avoid using too much.
- Bake Until Just Set. The cookies will continue to firm up as they cool. Take them out when the edges are set but the centers are still soft.
Variations
Red velvet cookies are already a delightful treat, but adding unique flavors and textures can take them to the next level. Whether you want something extra chocolaty, filled with cream cheese, or packed with crunch, here are some fun variations to try:
- Cream Cheese-Filled- Add a cream cheese filling for a gooey surprise in every bite.
- Nutty Red Velvet Cookies- Stir in chopped pecans or walnuts for extra crunch.
- Dark Chocolate- Use dark chocolate chips instead of white for a richer flavor.
- Crinkle Cookies- Roll the dough balls in powdered sugar before baking for a beautiful crackled effect.
- Gluten-Free- Substitute all-purpose flour with a 1:1 gluten-free flour blend.
What To Enjoy With Red Velvet Cookies
Red velvet cookies are rich, soft, and slightly chocolatey, making them perfect on their own or paired with complementary flavors that enhance their sweetness and texture. Whether you want something creamy, warm, or refreshing, here are some delicious ideas to serve with them:
- A glass of cold milk- The classic pairing for soft, chewy cookies.
- Vanilla ice cream- Sandwich two cookies with ice cream for a red velvet ice cream sandwich.
- Hot chocolate or coffee- The rich, chocolatey flavors complement each other perfectly.
- Cream cheese frosting- Spread a little on top for extra decadence.
How Long Do They Last?
Red velvet cookies can be stored at room temperature, in the refrigerator, or frozen, depending on how long you want them to last. When kept in an airtight container at room temperature, they stay soft and fresh for up to 5 days.
To extend their shelf life, you can refrigerate them for up to a week, ensuring they remain chewy and delicious.
Can You Freeze Them?
If you need to store them for a longer period, freezing is the best option. Place the fully cooled cookies in a single layer on a baking sheet, freeze for about an hour, and then transfer them to a freezer-safe bag or airtight container.
Properly stored, frozen red velvet cookies will last up to 3 months.
When you're ready to enjoy your leftovers, simply let them thaw at room temperature or warm them in the microwave for about 10–15 seconds for a freshly baked taste.
More Sweet Treats
- Low Carb Chocolate Chip Cookies
- French Silk Mousse
- Almond Flour Cookies
- Texas Sheet Cake
- High Protein Jello Mousse
Pin It!

If you love this recipe for Red Velvet Cookies as much as we do, make sure you share it with your friends on Facebook and Instagram so they can try it too! Don't forget to Pin it so you can make it again soon.
Ingredients
- 2 1/2 cups All Purpose Flour
- 3 tbsp Unsweetened Cocoa Powder
- 1 tsp Baking Soda
- 1/2 tsp Kosher Salt
- 1 cup Unsalted Butter, softened
- 3/4 cup Granulated Sugar
- 3/4 cups Brown Sugar
- 2 Eggs
- 2 tsp Vanilla Extract
- 1 tbsp Red Food Coloring
- 1 tsp White Vinegar
- 1 1/2 cups White Chocolate Chips
Instructions
- Preheat the Oven. Preheat your oven to 350°F and line a baking sheet with parchment paper.
- Mix the Dry Ingredients. In a medium bowl, whisk together the flour, cocoa powder, baking soda, and salt. Set aside.
- Cream the Butter and Sugars. In a large mixing bowl, beat the butter, granulated sugar, and brown sugar until light and fluffy. This takes about 2–3 minutes.
- Add the Wet Ingredients. Mix in the egg, vanilla extract, buttermilk (or vinegar), and red food coloring. Stir until well combined.
- Combine Wet and Dry Ingredients. Gradually add the dry ingredients to the wet mixture, mixing until just combined. Do not overmix, or the cookies may become dense.
- Fold in White Chocolate Chips (Optional). Gently fold in the white chocolate chips if using.
- Scoop and Bake. Use a cookie scoop or spoon to drop tablespoon-sized dough balls onto the lined baking sheet, spacing them about 2 inches apart. Bake for 9–11 minutes, or until the edges are set but the centers look slightly soft.
- Cool and Enjoy. Allow the cookies to cool on the baking sheet for 5 minutes, then transfer them to a wire rack to cool completely.
Leave a Reply